

The Designated Signing Broker feature in SkySlope Forms ensures every file is automatically assigned the correct Signing Broker — so your agents never have to think twice about getting the right signature on every contract.
In this article, we'll review:
Designated Signing Brokers in SkySlope Forms
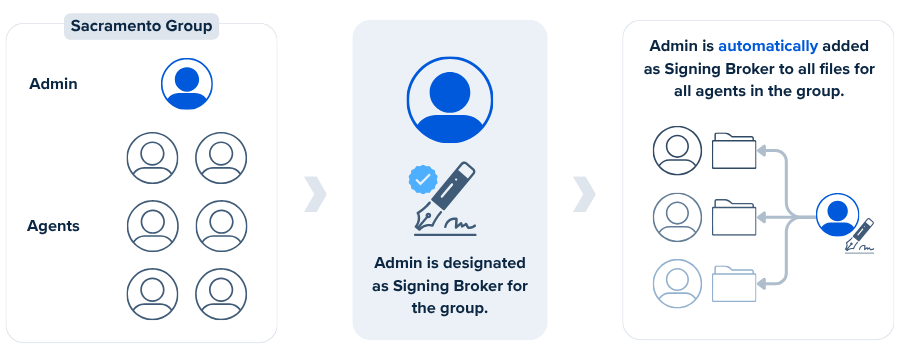
In SkySlope Forms, designated Signing Brokers are managed at the Group level. Once an admin/broker within a group is designated as a Signing Broker, they will automatically be added to every Forms file created by any user within the group. Once added to the file, they will be assigned as Needs to Sign on every e-signature envelope sent from that file.
Designate a Signing Broker in a Group
To assign a designated Signing Broker to a group in SkySlope Forms, follow these steps:
- From the SkySlope Forms dashboard, click on your name in the upper right.
- Then select Brokerage Management.
- Once on the My Team page in Brokerage Management, navigate to the Groups tab.
- Search for or click on a group name to open it.
- Once in the group, locate the individual you'd like to designate as a Signing Broker for the group.
- You can designate more than one Signing Broker within a group, but you will have to enable the permission one at a time. More details on designating multiple Signing Brokers below. - Click the ... icon and select Edit Group Permissions.
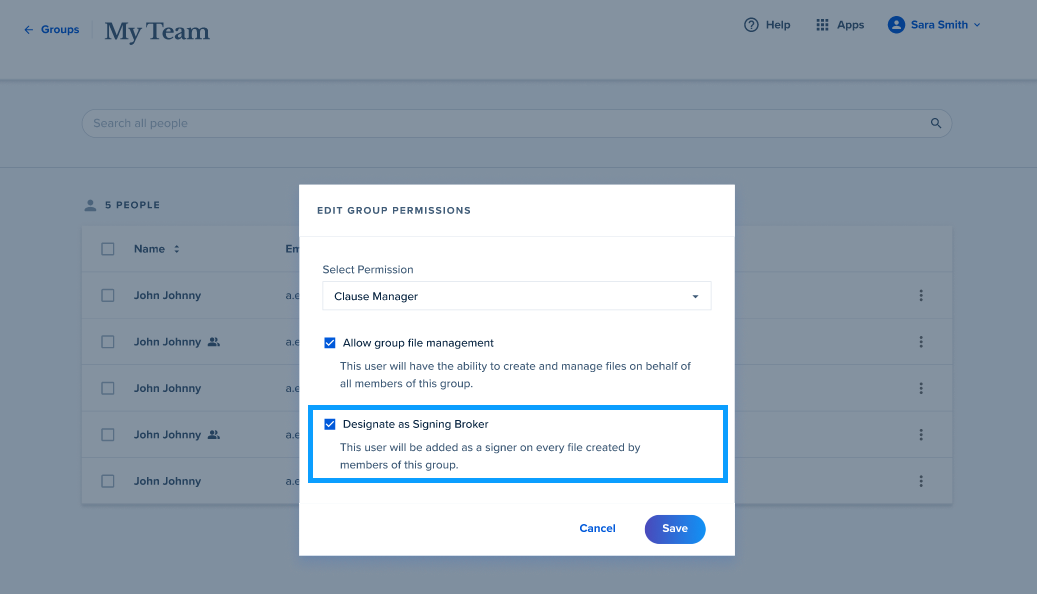
- With the Group Permissions settings open for that individual, check the box for Designate as Signing Broker.
- Click Save.
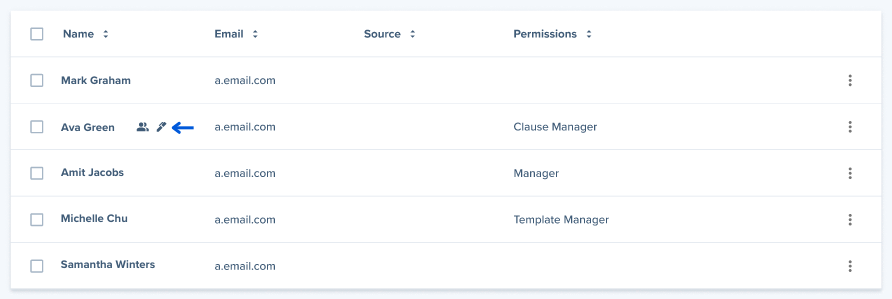
A designated Signing Broker within a group will have a pen icon next to their name:
Designating Multiple Signing Brokers in a Group
The process for designating multiple Signing Brokers within a Group is the same as for designating a single Signing Broker. You would follow the steps outlined above for the first Signing Broker, then follow the same steps for the second Signing Broker, and so on. There is no limit to the number of Signing Brokers a group can have.
While the workflow is the same on the set-up side, the agent's experience will vary slightly if there are multiple designated Signing Brokers in their group. The agent can select a default Signing Broker and a Signing Broker for each file. Learn about using a designated Signing Broker as an agent.
Signing Brokers in Action
With setup complete and Signing Brokers assigned in Brokerage Management, let's walk through the full workflow in SkySlope Forms.
Once a Signing Broker has been designated within a group, the Signing Broker will automatically be added as a "Needs to Sign" contact within every file that is created by any user within the group. Within each file, when an agent or a TC prepares an envelope for e-signatures, the Signing Broker will automatically be added as Needs to Sign on each envelope.
Here is the process at a glance:
- A Group is created in SkySlope Forms Brokerage Management.
- One or more users in that group are designated as the Signing Broker.
- Any user in the group creates a Forms file.
- The Signing Broker is automatically added as a Needs to Sign contact on that file.
- The agent can:
- Remove a Signing Broker from an individual file
- Set a default Signing Broker for all files (if the group has multiple Signing Brokers)
- Choose a different Signing Broker for an individual file (also requires multiple Signing Brokers in the group) - With a Signing Broker added to the file, all envelopes sent for e-signatures will automatically add the Signing Broker to that envelope as Needs to Sign.
- Signature blocks will be placed on the document, and the Signing Broker will receive an invitation to sign via email.
Signing Brokers as an Agent
To take a closer look at Signing Brokers in SkySlope Forms from the Agent's perspective, please refer to this resource: Using Signing Brokers as an Agent. This resource outlines how an agent can select a default Signing Broker, switch to another Signing Broker, unassign all Signing Brokers, and more.
If you have any other questions about using Signing Brokers in SkySlope Forms, please reach out to our Support team. Happy SkySloping!
Was this article helpful?
That’s Great!
Thank you for your feedback
Sorry! We couldn't be helpful
Thank you for your feedback
Feedback sent
We appreciate your effort and will try to fix the article